Blog Layout

The DIY Guide to Building a Custom Closet: Tips from a Boulder Lumber Yard

May 9, 2024

Transforming your closet from a cluttered space into an organized oasis can be a rewarding DIY project. With the right tools, materials, and guidance, building a custom closet tailored to your needs is within reach. In this comprehensive guide, we'll walk you through the steps to create a custom closet that maximizes space and functionality, with expert tips from Budget Home Supply, your top Boulder lumber yard.


Planning Your Custom Closet

Assess Your Needs

Before diving into your closet makeover project, take some time to assess your needs and priorities. Consider factors such as the size of your closet, your storage requirements, and your budget. Determine what items you need to store, such as clothing, shoes, accessories, and linens, and how you want them organized.


Measure Your Space

Measure the dimensions of your closet, including width, height, and depth. Take accurate measurements of the walls, floor, and ceiling, as well as any existing shelving or hanging rods. This will help you determine how much space you have to work with and plan your closet layout accordingly.


Designing Your Closet Layout

Sketch Your Design

Create a rough sketch or diagram of your custom closet layout, taking into account the measurements and dimensions of your space. Consider incorporating features such as shelving, hanging rods, drawers, and cubbies to maximize storage and organization. Be sure to leave enough clearance space for accessing your belongings comfortably.


Utilize Online Design Tools

Take advantage of online design tools and software to create a more detailed and accurate closet layout. Many home improvement stores in Boulder offer free online design services that allow you to customize your closet design, choose materials and finishes, and visualize the final result before making any purchases.


Choosing Materials and Supplies

Select High-Quality Lumber

Choose high-quality lumber for building your custom closet, such as pine, cedar, or melamine-coated particleboard. Visit a Boulder lumber yard like Budget Home Supply to explore a wide selection of lumber options and get expert advice on choosing the right materials for your project.


Consider Hardware and Accessories

Don't forget to consider hardware and accessories for your custom closet, such as drawer pulls, handles, knobs, and hanging rod brackets. Choose hardware that complements the style and aesthetic of your closet and ensures smooth operation of drawers and doors.


Building Your Custom Closet

Install Shelving and Hanging Rods

Begin by installing shelving and hanging rods in your closet according to your layout design. Use a level to ensure that shelves and rods are installed straight and evenly spaced. Consider adjustable shelving and rods for added flexibility and customization.


Assemble Drawers and Cabinets

If your custom closet includes drawers and cabinets, assemble them according to the manufacturer's instructions. Use quality hardware and fasteners to ensure stability and durability. Install drawer slides and door hinges carefully to ensure smooth operation.


Add Finishing Touches

Once the main components of your custom closet are in place, add finishing touches such as trim, molding, and paint or stain to enhance the appearance and durability of your project. Consider adding lighting fixtures, mirrors, and organizational accessories to further customize your closet to your needs.


Organizing Your Closet

Sort and Declutter

Before transferring your belongings into your new custom closet, take some time to sort through your items and declutter. Donate or discard items you no longer need or use, and organize the remaining items into categories for easy storage and access.


Arrange Items Strategically

Organize your clothing, shoes, accessories, and other belongings strategically within your custom closet. Group similar items together and store frequently used items within easy reach. Use bins, baskets, and dividers to keep smaller items organized and maximize space.


Maintaining Your Custom Closet

Regular Maintenance

To keep your custom closet looking and functioning its best, perform regular maintenance tasks such as dusting, vacuuming, and wiping down surfaces. Inspect hardware and fasteners periodically for signs of wear or damage and make any necessary repairs or replacements.


Seasonal Updates

Consider updating your custom closet seasonally to accommodate changes in wardrobe and storage needs. Rotate out seasonal clothing and accessories, and adjust shelving and hanging configurations as needed to optimize space and organization.


Building a custom closet is a rewarding DIY project that can enhance the functionality and organization of your home. By following the steps outlined in this guide and utilizing
expert tips from a Boulder lumber yard like Budget Home Supply, you can create a custom closet that meets your unique needs and preferences. From planning and designing to choosing materials and building, building a custom closet allows you to maximize space and efficiency while adding value and style to your home. So roll up your sleeves, grab your tools, and get ready to transform your closet into a stylish and organized oasis!

October 28, 2024
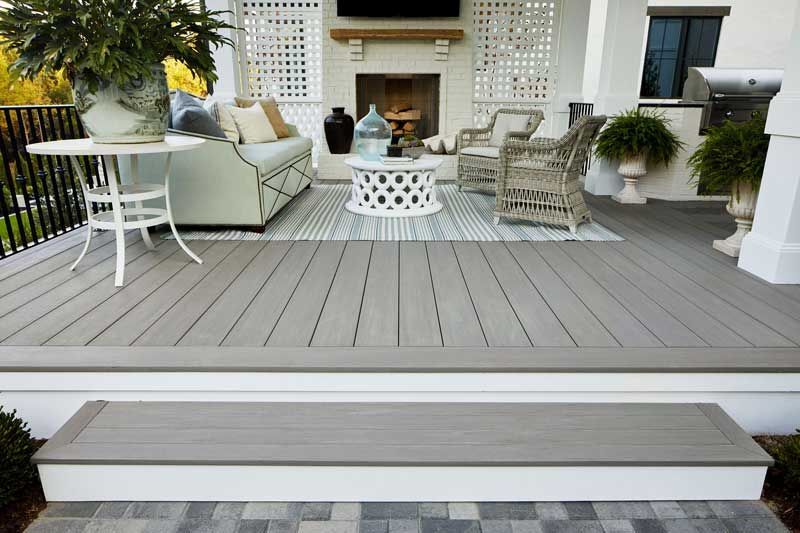
Why Wood Decking is Better Than Composite Decking for Your Home Thinking about sprucing up your backyard with a stunning deck? When it comes to choosing the right material for your deck , the decision often boils down to wood vs composite decking. Each option has its advantages, but many homeowners still prefer the classic appeal of wood decking for homes.  If you're considering building a deck, we can explain why wood decking might be the perfect fit for your home. It offers a budget-friendly and beautiful outdoor oasis. Timeless Beauty of Wood Decking One of the most compelling reasons to choose wood decking is its natural beauty. Wood has a rich, warm appearance blends naturally with most outdoor environments. While composite decking has come a long way, it often can't replicate the organic feel and timeless charm of wood. Each wood plank is unique, offering varied grains, knots, and colors that make your deck one-of-a-kind. Additionally, wood decking can be easily stained or painted in various shades to match your home's aesthetic. If you ever want to change the look, refinishing wood is relatively simple, allowing you to switch up the vibe of your outdoor space without replacing the entire deck. Affordability When you compare wood vs composite decking, wood generally wins on price. Although composite decking materials have become more affordable, they can still be significantly more expensive than wood. Wood decking is a smart option if you're working with a tight budget but still want a high-quality deck. Budget Home Supply offers various wood types at competitive prices, making it easier to choose a cost-effective material without compromising quality. If you're handy, wood decking allows for a more budget-friendly DIY project. Eco-Friendly Option For environmentally conscious homeowners, wood decking is often the more sustainable option. Most wood used for decking is harvested from responsibly managed forests, making it a renewable resource. With proper care and maintenance, a wood deck can last for decades, reducing the need for frequent replacements that could add to waste. Composite decking, on the other hand, is made from a combination of plastic and wood fibers. While some composite products use recycled materials, many still rely on plastics, which can have a higher carbon footprint. If sustainability is a priority for you, choosing wood could help reduce your environmental impact. Comfort and Temperature If you plan on spending a lot of time on your deck, comfort is key. In the battle of wood vs composite decking, wood is often cooler underfoot, making it a more comfortable choice during hot summer months. Composite decking materials, especially darker colors, tend to absorb heat, making them uncomfortable to walk barefoot. This is vital to consider if you live in a warmer climate or if your deck gets direct sunlight. Wood's natural texture also makes it feel more inviting, giving it an organic softness that enhances the outdoor experience. Plus, wood won’t retain heat as much as synthetic materials, ensuring a more enjoyable space for entertaining and relaxing. Repairability Over time, wear and tear are inevitable, but wood decking is easier to repair than composite. If a section of your wood deck becomes damaged, you can typically replace individual boards or sand them down to restore the surface. With composite decking, repairs can be more complicated. Matching colors and textures in composite materials can be difficult, and some types of composite decking don’t allow for spot repairs, meaning you might need to replace larger deck sections. Wood's natural composition allows for refinishing, giving your deck a second life and saving you money in the long run. Regular sanding and staining can breathe new life into your deck, making it look almost brand new again. Classic Appeal There's something undeniably classic about wood decking for homes. It's a choice that has stood the test of time. From rustic to modern homes, wood can complement any architectural style. It's versatile, allowing various design options like custom railings, built-in seating, or intricate woodwork. The flexibility of wood as a material gives you endless possibilities when designing your outdoor space. While durable and low-maintenance, composite decking may not offer the same level of flexibility when it comes to customization. Wood is often the better option if you want a deck that feels like a true extension of your home. Customization Options When it comes to wood decking, you have several options, whether it’s pressure-treated wood, cedar, or exotic hardwoods like ipe or mahogany. Each type of wood offers unique qualities in terms of durability, appearance, and price. For instance, cedar is very resistant to rot and insects, which makes it a long-lasting option for outdoor decks. Additionally, Budget Home Supply offers a range of wood materials , allowing you to pick the right fit for your climate, budget, and aesthetic preferences. Maintenance It’s no secret that wood decks require more maintenance than composite decking, but it’s often overstated how much work wood needs. Basic care, such as annual cleaning, occasional sealing, and periodic staining, can keep your wood deck looking fantastic for years. Maintaining wood is straightforward with the right products and a little elbow grease. If you enjoy outdoor projects or take pride in keeping your home in top shape, maintaining a wood deck can be a satisfying experience. Plus, wood's ability to be sanded and refinished gives it an advantage over composite, which can show irreversible wear after years of use. Value and ROI When considering the long-term value of wood vs composite decking, wood often provides a better return on investment. Many homebuyers are drawn to the natural beauty of wood decks, which can enhance curb appeal and increase the overall value of your home. While composite decks may last longer and require less maintenance, they may not offer the same aesthetic appeal to prospective buyers. Wood decking provides a sense of craftsmanship and tradition, which can be especially appealing in homes with natural landscapes or older architectural styles. Refreshing your wood deck with stains or paints allows you to keep it looking fresh and appealing, further adding to its value. Bottom Line: Wood Decking Wins for Many Homeowners In the debate of wood vs composite decking, the natural beauty, affordability, and repairability of wood decking make it a standout choice for many homeowners. Whether you want to create a cozy backyard retreat or an elegant outdoor entertaining space, wood offers flexibility, timeless style, and a solid return on investment. At Budget Home Supply, we offer various wood decking materials to suit every need and budget. Consider wood if you want to build a deck that combines beauty with durability. Visit us at Budget Home Supply to explore your options and make your outdoor space the best it can be. So, why wait? Start planning your dream wood deck today!
October 27, 2024
Discover the best hardwood for kitchen cabinets! Explore options like maple, oak, cherry, and more, and find the perfect fit for your home at Budget Home Supply.
September 12, 2024
Explore the best pergola materials for your outdoor space in Longmont, Colorado. Learn about wood, vinyl, aluminum, and more to find the perfect fit for your needs.
September 9, 2024
Discover top home improvement projects to enhance your curb appeal. From fresh paint to landscaping tips, Budget Home Supply has everything you need.
July 20, 2024
Discover the ultimate guide to composite decking with Budget Home Supply. Follow step-by-step instructions for a perfect deck with the best lumber in Boulder.
July 19, 2024
Discover the best choice for your home: wood decking or composite decking. Make the right decision with our Boulder lumber masters.
July 9, 2024
Maintaining a home involves various aspects, and plumbing is one of the most critical areas. From fixing minor leaks to addressing major plumbing issues, having the right supplies on hand can save time, money, and prevent potential damage. Whether you are a DIY enthusiast or just want to be prepared for emergencies, this guide covers the essential plumbing supplies every Boulder homeowner should have. Drawing from resources available at your local Boulder lumber yard and home improvement stores, such as Budget Home Supply, we’ll help you build a well-equipped plumbing toolkit. Basic Plumbing Tools 1. Pipe Wrenches A pipe wrench is a fundamental tool for any plumbing job. Its adjustable jaw allows you to grip pipes of various sizes securely. You'll need at least two – one to hold the pipe and another to turn it. These are particularly useful for working on galvanized steel and iron pipes. 2. Plunger A plunger is indispensable for unclogging drains and toilets. There are two main types: the cup plunger, ideal for sinks and bathtubs, and the flange plunger, designed specifically for toilets. Ensure you have both types to handle different clogging issues efficiently. 3. Plumber’s Tape Also known as Teflon tape, plumber’s tape is essential for sealing pipe threads. It prevents leaks at the joints and is used on threaded fittings to create a watertight seal. Always keep a roll or two in your plumbing toolkit. 4. Adjustable Wrenches Adjustable wrenches are versatile tools that can be used for various plumbing tasks. They are ideal for tightening or loosening nuts and bolts on fixtures and appliances. A set of different sizes will cover most plumbing needs. 5. Basin Wrench A basin wrench is specifically designed to work in tight spaces, such as under sinks. Its long handle and pivoting jaw make it easy to reach and turn nuts on faucet connections. Essential Plumbing Supplies 1. Pipe and Pipe Fittings Having a selection of pipes and fittings in various sizes and materials (PVC, copper, and PEX) is crucial for any plumbing repair or installation. These can be used to replace damaged sections of piping or to extend existing plumbing lines. 2. Plumber’s Putty Plumber’s putty is a pliable sealing compound used to create watertight seals around faucets, sinks, and drains. It’s essential for preventing leaks where fixtures meet surfaces. 3. PVC Cement and Primer For working with PVC pipes, you’ll need PVC cement and primer. The primer cleans and softens the pipe, while the cement creates a strong, permanent bond. These are essential for any PVC plumbing project. 4. Pipe Insulation Insulating your pipes helps prevent freezing in the winter and reduces heat loss in hot water pipes. Foam pipe insulation is easy to install and can be cut to fit various pipe sizes. 5. Hose Bibs Hose bibs, or outdoor faucets, are useful for connecting garden hoses and other outdoor water needs. Having a spare hose bib can be handy for replacements or new installations. Advanced Plumbing Supplies 1. Pipe Cutters Pipe cutters are necessary for cutting pipes to the desired length. There are different types for various materials: a tubing cutter for copper pipes, a plastic pipe cutter for PVC, and a saw for larger pipes. 2. Drain Auger (Snake) A drain auger, or plumbing snake, is essential for clearing stubborn clogs in drains and pipes. It’s more effective than a plunger for serious blockages and can reach deeper into the plumbing system. 3. Faucet Repair Kits Faucet repair kits contain all the parts needed to fix common issues like leaks or drips. These kits typically include washers, O-rings, and other components specific to different types of faucets. 4. Soldering Kit For working with copper pipes, a soldering kit is necessary. The kit should include a propane torch, solder, flux, and a pipe cleaning brush. Properly soldering pipe joints ensures a secure, leak-free connection. 5. Water Pressure Gauge A water pressure gauge helps monitor the pressure in your plumbing system. Excessive pressure can damage pipes and fixtures, while low pressure can indicate problems like blockages or leaks. Safety and Maintenance Supplies 1. Safety Gloves and Goggles Safety should always be a priority when working on plumbing projects. Protective gloves and goggles protect your hands and eyes from debris, chemicals, and sharp objects. 2. Buckets and Towels Having buckets and towels on hand is essential for containing water during plumbing repairs. They help manage spills and leaks, keeping your work area clean and dry. 3. Leak Detection Dye Leak detection dye is a useful tool for identifying leaks in toilets and other fixtures. Adding the dye to the water can help pinpoint the source of the leak quickly and accurately. 4. Shutoff Valve Wrench A shutoff valve wrench is used to turn off the main water supply to your home. In an emergency, being able to quickly shut off the water can prevent significant damage. 5. Plumbing Handbook Having a comprehensive plumbing handbook provides valuable information and step-by-step instructions for various plumbing tasks. It’s a great resource for both beginners and experienced DIYers. Purchasing Plumbing Supplies in Boulder When it comes to sourcing your plumbing supplies, Budget Home Supply is your go-to destination in Boulder. As a leading home improvement store, they offer a wide range of plumbing supplies, tools, and materials to meet all your needs. Whether you’re tackling a small repair or a major renovation, Budget Home Supply provides high-quality products and expert advice to help you succeed. Expert Advice and Quality Products At Budget Home Supply, you can rely on the expertise of their staff to guide you through your plumbing projects. Whether you need assistance selecting the right tools or advice on the best materials for your specific needs, their knowledgeable team is always ready to help. Wide Range of Supplies Budget Home Supply stocks an extensive selection of plumbing supplies, including pipes, fittings, sealants, and tools. They also offer a variety of lumber options for your home improvement projects, making it a one-stop shop for all your needs. Whether you’re looking for high-quality lumber in Boulder or plumbing supplies in Boulder, Budget Home Supply has you covered. Convenient Location Located at 780 Boston Ave., Longmont, CO, Budget Home Supply is easily accessible for residents of Boulder and the surrounding areas. Their convenient location ensures that you can quickly and easily find the supplies you need for your plumbing projects. DIY vs. Professional Help When to DIY Many plumbing tasks can be handled by homeowners with the right tools and knowledge. Simple repairs, such as fixing a leaky faucet or unclogging a drain, are often manageable DIY projects. With the proper supplies and a bit of guidance, you can save money and gain the satisfaction of completing the work yourself. When to Call a Professional For more complex plumbing issues, such as major leaks, pipe replacements, or water heater installations, it’s best to call a professional plumber. These tasks require specialized skills and tools, and attempting them without the necessary expertise can lead to further damage and costly repairs. Conclusion Having the essential plumbing supplies on hand is crucial for every Boulder homeowner. By equipping yourself with the right tools and materials, you can tackle common plumbing issues with confidence and efficiency. Budget Home Supply, a trusted home improvement store in Boulder, offers a wide range of high-quality plumbing supplies and expert advice to help you succeed in your DIY projects. Whether you’re working on kitchens in Longmont, sourcing plumbing supplies in Boulder, or purchasing lumber in Boulder, Budget Home Supply is your go-to destination for all your home improvement needs. Visit their store or website to explore their extensive selection and get started on your next project today. With the right supplies and a bit of DIY spirit, you can keep your home’s plumbing system in top shape and handle any issues that arise with ease.
June 15, 2024
Transforming your kitchen with stylish, custom hardwood cabinets can elevate the aesthetics and functionality of your space. Hardwood cabinets offer durability, timeless appeal, and customization options that fit any kitchen design. In this blog, we will guide you through the process of constructing stylish hardwood kitchen cabinets and storage solutions, leveraging resources from a trusted Boulder lumber yard. Whether you are in Longmont, Boulder, or the surrounding areas, these tips and insights will help you create the kitchen of your dreams. Why Choose Hardwood for Kitchen Cabinets? Durability and Longevity Hardwood is known for its strength and durability, making it an ideal material for kitchen cabinets. When properly maintained, hardwood cabinets can last for decades, resisting wear and tear from daily use. Timeless Aesthetics Hardwood offers a classic, timeless look that complements various kitchen styles, from traditional to contemporary. The natural grain patterns and rich colors add warmth and elegance to your kitchen. Customization Options With hardwood, you have endless customization options. You can choose from various wood species, finishes, and hardware to match your design preferences. Whether you prefer the deep tones of cherry, the light hues of maple, or the distinctive grain of oak, there is a hardwood option to suit your taste. Planning Your Hardwood Kitchen Cabinets Assess Your Needs Before you start building your cabinets, assess your kitchen needs. Consider your storage requirements, the layout of your kitchen, and the design elements you want to incorporate. Think about how you use your kitchen daily and what improvements can enhance your workflow and organization. Design Your Layout Designing your kitchen cabinet layout is a crucial step. Use design software or sketch your ideas on paper. Consider the placement of appliances, countertops, and plumbing. Efficiently utilize your space by incorporating a mix of upper cabinets, base cabinets, and specialty storage solutions like pull-out shelves and corner units. Selecting the Right Hardwood Choosing the right hardwood species is essential for both aesthetics and functionality. Here are some popular options: Oak: Known for its durability and prominent grain pattern, oak is a versatile choice for kitchen cabinets. Maple: Maple's light color and smooth grain make it a popular choice for modern and traditional kitchens alike. Cherry: With its rich, dark tones and elegant grain, cherry wood adds a luxurious feel to your kitchen. Hickory: Hickory's distinctive grain and strong character make it a great choice for rustic or farmhouse-style kitchens. Sourcing Quality Lumber Visit a reputable Boulder lumber yard like Budget Home Supply to source high-quality hardwood for your cabinets. They offer a wide selection of lumber in Boulder, ensuring you find the perfect material for your project. Consult with their experts to understand the best wood options for your specific needs and budget. Building Your Hardwood Cabinets Gather the necessary tools and materials for your cabinet construction. You will need: - Hardwood lumber - Plywood for cabinet backs and shelves - Wood glue - Screws and nails - Sandpaper - Wood stain or paint - Hinges, handles, and other hardware Constructing the Cabinets 1. Cutting the Wood: Measure and cut your hardwood pieces according to your design specifications. Precision is key to ensuring that all pieces fit together correctly. 2. Assembling the Frames: Assemble the cabinet frames using wood glue and screws. Ensure that the frames are square and level. 3. Adding the Backs and Shelves: Attach plywood backs to the cabinet frames and install shelves at desired heights. 4. Constructing the Doors and Drawers: Cut and assemble the doors and drawers, ensuring they fit snugly within the cabinet frames. Use high-quality hinges and drawer slides for smooth operation. 5. Finishing Touches: Sand all surfaces to a smooth finish and apply your chosen stain or paint. Add hardware like handles and knobs to complete the look. Expert Tips for a Professional Finish Pre-Sand Wood Pieces: Sand all pieces before assembly to achieve a smooth, even surface. Use Quality Fasteners: Invest in high-quality screws and nails to ensure the longevity and stability of your cabinets. Consider Soft-Close Hardware: Soft-close hinges and drawer slides add a touch of luxury and prevent slamming. Enhancing Storage Solutions Maximizing Space Maximize your kitchen storage by incorporating clever solutions such as pull-out shelves, lazy Susans, and deep drawers. These features improve accessibility and organization, making your kitchen more functional. Custom Additions Consider custom additions like built-in spice racks, utensil organizers, and vertical dividers for baking sheets and cutting boards. These enhancements tailor your kitchen to your specific needs and preferences. Utilizing Vertical Space Take advantage of vertical space by installing tall cabinets that reach up to the ceiling. This not only provides extra storage but also creates a cohesive, streamlined look. Maintaining Your Hardwood Cabinets Regular Cleaning Keep your hardwood cabinets looking beautiful by regularly cleaning them with a soft cloth and mild detergent. Avoid harsh chemicals that can damage the wood finish. Periodic Maintenance Periodically check for any signs of wear or damage. Reapply wood finish as needed to protect the surface and maintain its luster. Handling Moisture Since kitchens are prone to moisture, ensure that your cabinets are well-sealed and promptly wipe up any spills to prevent water damage. Constructing stylish hardwood kitchen cabinets is a rewarding project that enhances both the aesthetics and functionality of your kitchen. By sourcing quality materials from a trusted Boulder lumber yard like Budget Home Supply, and following careful planning and construction techniques, you can create beautiful, durable cabinets that meet your needs. Whether you’re in Longmont or Boulder, Budget Home Supply is your go-to source for all your home improvement needs, from lumber to plumbing supplies and more. Visit their store or website to explore their extensive selection and get started on your next project today. Creating your dream kitchen is within reach with the right materials, tools, and a bit of DIY spirit. So roll up your sleeves, get inspired, and transform your kitchen with custom hardwood cabinets that will stand the test of time.
May 9, 2024
Discover the ideal kitchen cabinets in Longmont at Budget Home Supply. Find the perfect fit for your home renovation project.
March 9, 2024
In the picturesque city of Boulder, Colorado, nestled against the stunning backdrop of the Rocky Mountains, lies a haven for DIY enthusiasts and homeowners alike: tons of local lumber yards. Boulder's lumber yards offer an abundance of high-quality materials, perfect for a myriad of creative projects to enhance your home. Whether you're a seasoned DIYer or just starting out, here are five imaginative projects using locally sourced materials. High-Quality Lumber in Boulder: A Testament to Excellence Boulder, Colorado, renowned for its breathtaking natural beauty and commitment to sustainability, is also home to a lumber industry that prides itself on providing high-quality materials. The lumber sourced in Boulder benefits from the region's rich forests, where slow growth rates result in dense, sturdy wood with exceptional strength and durability. Furthermore, Boulder's lumber yards meticulously select and process their inventory, ensuring that only the finest cuts make it to market. With a dedication to environmental stewardship and a focus on craftsmanship, the lumber in Boulder stands as a testament to excellence, offering homeowners and builders alike the assurance of superior quality for their projects. Rustic Wood Accent Wall Materials Needed: - Various lengths and types of lumber (pine, cedar, reclaimed wood) - Nails or screws - Hammer or drill - Saw (if custom cuts are required) - Sandpaper - Wood stain or paint (optional) Instructions: 1. Measure the wall space where you want to create your accent wall. 2. Visit your local Boulder lumber yard to select the perfect wood for your project. Consider different textures and finishes to achieve the desired rustic look. 3. Cut the wood to the desired lengths, ensuring they fit snugly against the wall. 4. Sand the edges and surfaces of the wood to smooth out any rough spots. 5. Begin attaching the wood to the wall using nails or screws. Start from the bottom and work your way up, ensuring each piece is level. 6. Once all the wood is attached, you can leave it natural for a rustic look or stain/paint it to match your decor. 7. Step back and admire your beautiful new accent wall! Custom Kitchen Shelving Materials Needed: - Lumber (preferably hardwood for durability) - Shelf brackets - Screws - Drill - Level - Wood stain or paint (optional) Instructions: 1. Measure the space where you want to install the shelves in your kitchen. 2. Visit your local Boulder lumber yard to choose the appropriate wood for your shelves. Consider the weight of the items you'll be placing on them. 3. Cut the wood to the desired lengths for your shelves. 4. Install the shelf brackets on the wall using screws and a drill, ensuring they are level. 5. Place the cut wood on top of the brackets to create the shelves. 6. Secure the wood to the brackets using screws. 7. Optionally, stain or paint the shelves to match your kitchen decor. 8. Enjoy your custom kitchen shelving, perfect for storing cookbooks, dishes, and more! Garden Planter Boxes Materials Needed: - Cedar or redwood lumber - Screws - Drill - Saw - Sandpaper - Wood stain or paint (optional) - Plastic liner (to protect the wood from soil and moisture) Instructions: 1. Determine the size and shape of your planter boxes. 2. Visit your local Boulder lumber yard to select the appropriate wood for outdoor use. 3. Cut the wood to the desired lengths for the sides, bottom, and optional trim. 4. Assemble the planter boxes by screwing the sides together to form a rectangular shape. 5. Attach the bottom of the planter box using screws, ensuring it is securely fastened. 6. Sand the edges and surfaces of the planter boxes to smooth out any rough spots. 7. Optionally, stain or paint the planter boxes to complement your garden decor. 8. Line the inside of the planter boxes with plastic liner to protect the wood from soil and moisture. 9. Fill the planter boxes with soil and plant your favorite flowers, herbs, or vegetables. 10. Place the planter boxes in your garden or on your patio and enjoy watching your plants thrive! DIY Floating Shelves Materials Needed: - Lumber (preferably hardwood for strength) - Wall anchors - Screws - Drill - Level - Wood stain or paint (optional) Instructions: 1. Measure the space where you want to install the floating shelves. 2. Visit your local Boulder lumber yard to choose the appropriate wood for your shelves. 3. Cut the wood to the desired lengths for your shelves. 4. Drill holes in the back of the shelves for the wall anchors. 5. Install the wall anchors in the wall at the desired locations. 6. Attach the shelves to the wall anchors using screws, ensuring they are level. 7. Optionally, stain or paint the shelves to match your decor. 8. Arrange books, photos, or decorative items on your new floating shelves for a personalized touch to any room! Outdoor Dining Table Materials Needed: - Cedar or redwood lumber - Screws - Drill - Saw - Sandpaper - Wood stain or paint - Outdoor wood sealant Instructions: 1. Determine the size and shape of your outdoor dining table. 2. Visit your local Boulder lumber yard to select the appropriate wood for outdoor use. 3. Cut the wood to the desired lengths for the table legs, frame, and tabletop. 4. Assemble the table frame by screwing the legs to the frame pieces. 5. Attach the tabletop to the frame using screws, ensuring it is securely fastened. 6. Sand the edges and surfaces of the table to smooth out any rough spots. 7. Optionally, stain or paint the table to complement your outdoor decor. 8. Apply a coat of outdoor wood sealant to protect the table from the elements. 9. Place the table in your outdoor dining area and enjoy al fresco meals with family and friends! With a trip to your local Boulder lumber yard and a little creativity, the possibilities for DIY projects are endless. Whether you're sprucing up your home's interior or enhancing your outdoor living space, these projects are sure to add charm and functionality to your surroundings. So roll up your sleeves, grab your tools, and let your imagination run wild!
More Posts
Share by: